Nighthawk AX12 is one of the most powerful routers out there. It comes in handy to strengthen the existing WiFi range. To have that strong internet connection, you need to first perform the Netgear Nighthawk AX12 setup process. After that, you can easily access the WiFi connection with enhanced speed and connectivity.
This article covers some of the easiest steps you need to take for the setup process. While doing the setup, you also get to do the Netgear router login. Hence, it not only ensures you have a stronger WiFi connection but also has access to the router’s dashboard. Let’s get through the setup process.
Netgear Nighthawk Router Setup Process
Router Unboxing
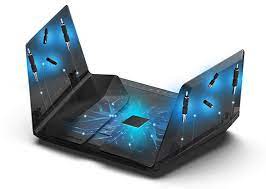
The first step starts with taking out the Netgear router from the box. This needs a little attention since the router is delicate. Even minimal damage can lead to issues. Moreover, you should get out the antennas so that you can attach them to the router.
Don’t miss out on the Ethernet and power cables that you get with the router. These will come in handy to have stronger connections later.
Power on the Router
You need to power on the Netgear router. Plug the Nighthawk router into a power outlet. However, while doing so, you should first check the power outlet. It must not be crooked, damaged, or loose. After that, the power cable plays an important role.
Connect the power cable to the router and plug it into a switchboard. Make sure you use a new wire. In case you are using an old wire, it must not be worn out.
Router Placement
Place the router in a place that offers the least WiFi interference. Never place the router in a corner or on the ground. That won’t permit the WiFi signals to flow freely. Rather, the router will have numerous WiFi interferences.
Furthermore, keep electrical gadgets, metal objects, and reflexive things away from the Nighthawk router. Doing this ensures you get strong WiFi signals in every corner of your house.
Connect With the Modem
To do the Netgear Nighthawk AX12 setup, a strong connection between the router and modem is a must. Hence, you should connect either by using a cable or wirelessly. Connecting them wirelessly might have a weaker connection because of WiFi interferences.
However, to have a stable connection, you should use the Ethernet cable that you got with the extender. Place them closer to each other while connecting them. This negates any problem or error while doing the Netgear Nighthawk setup.
Turn on the PC
After preparing your router, turn to your computer or laptop. Using this computer, you are going to access the official router login page. For that, you need to enter the router’s official web address. So, for that purpose, make sure your computer is ready.
Connect your computer to a power source. Press the power button on your PC and prepare it to access the router’s official web address.
Open a Web Browser
Start with opening a web browser on your computer. The web browser that you choose should be up to date. When that opens, get to the address bar and enter the web address. Make sure you don’t enter the wrong page address.
After entering the web address, press the Enter key. It takes you to the router login page.
Type in Login Details
When the Netgear router login page opens, you need to enter your login details in the prescribed space. That is why you should keep the default login details by your side. However, in case you ever changed the login details, you need to enter the new data. Tap the Log In button to do the login.
Follow On-Screen Directions
Follow all the onscreen instructions and apply all the changes. After that, your Netgear Nighthawk AX12 setup is complete. Hence, you can close the browser and enjoy an internet connection in any corner of the house.
Wrap Up
Follow all the steps given above to do the Netgear Nighthawk router login. After that, you get a strong, seamless, and stable internet connection without any hassle.


